At this stage we assume you have gotten Worldcraft installed and configured correctly, and are set to learn about the editor.
Load up the Sample LevelIn the editor click File and then Open, navigate to your Worldcraft/sample/mission folder and select the sample.rmf and click open.
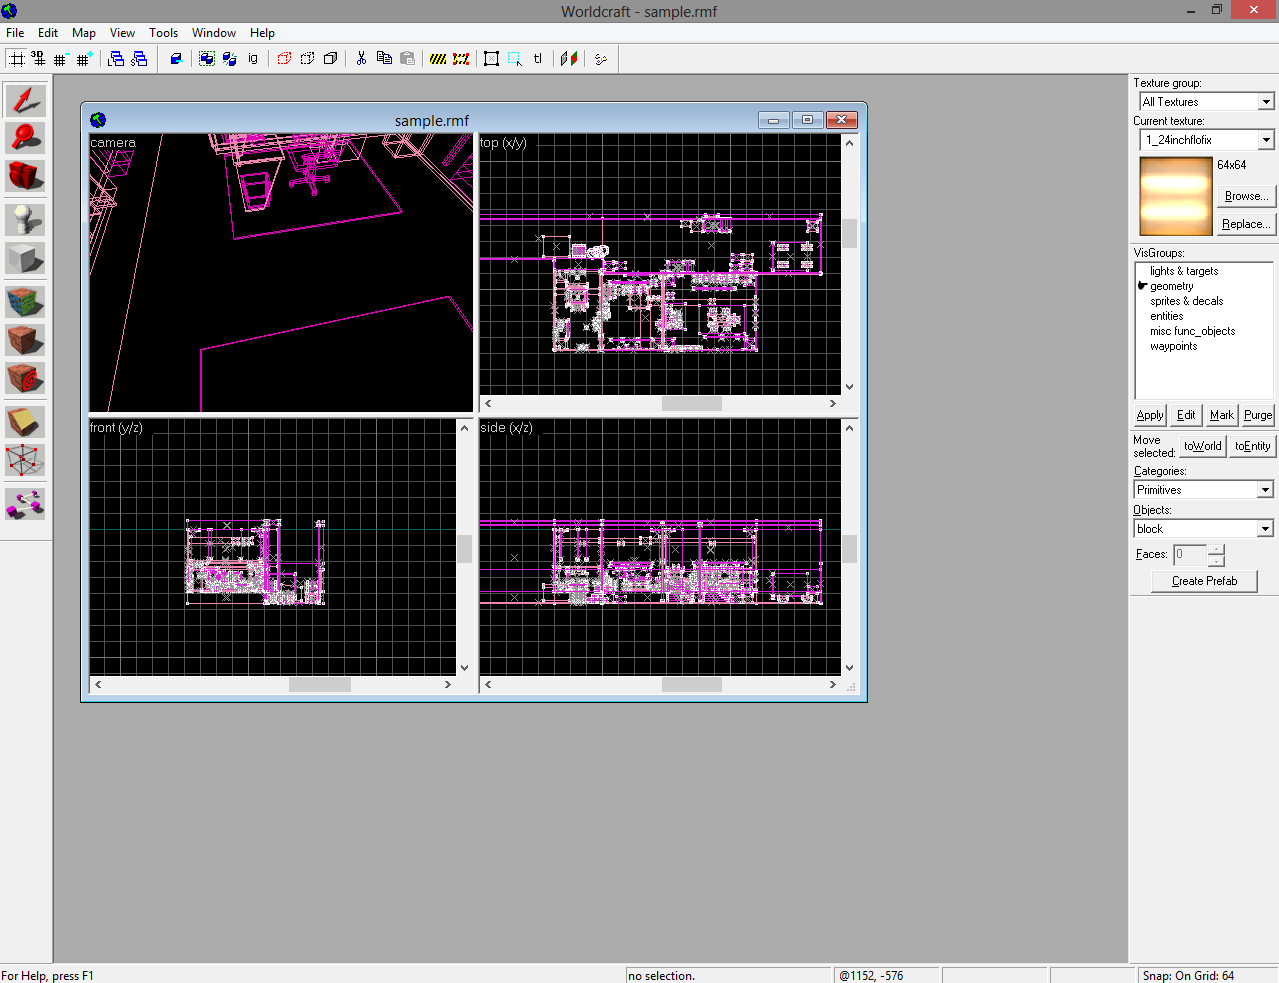
You should be presented by something similar to this image above. What you are looking at is a toolkit that will help you build the level you want through the use of view-port navigation. In the center you see four view-ports named camera, top, side, front, and in these viewports you see lots of pink/purple lines that represent the wireframe that makes up the levels geometry. If your view is like mine you will want to go ahead and maximize the view-port window (the more screen space you have to work with is in general a better way to work).
This is what you will see most of the time you are in the editor. So now we will deal with how to move around in the view-ports before covering the various button and knobs.
Orthographic View-portsLets start with the 3 views other than the camera. These are what are called Orthographic views and they represent a flat view from the top of an object/scene or from the front of the object/scene or the side of an object/scene.
To move about in these view-ports you need to place your mouse over the view you want to move and hold down the space-bar. This will bring up a hand icon and you can now drag you scene around to the position you want to concentrate on. Once you find an area you want to work with you can zoom in/out of it by using your mouse scroll-wheel (with or without the space-bar held). If you do not have a mouse with a scroll-wheel you can use the keys 'd' to zoom in and 'c' to zoom out instead.
If you have a scene that contains some geometry you can use your left mouse button (LMB) to select the various objects that make up that scene (level).
Using the right mouse button (RMB) bring ups a menu relating to the objects you have selected.
There are also scroll bars on the sides of these windows to help you get around the level quicker if needed, just hold and drag.
Lastly for the Orthographic views you can LMB or RMB on the view-port name (Top, Front, Side) to access more options. These allow you to change the view-port to a different view if you prefer a different layout (for example 3DS max users have there camera(perspective) in the bottom right). You can also change the type of shading (wire-frame, flat, textured) this will be essential as you move through your editing.
Perspective View-portThe Camera view-port is known as a perspective view. This simply means that we can move in and out of the 3D space like we do in real life. By utilizing the w,a,s,d, keys we can control the camera much like we do a 3D game character. however at this point we cannot rotate the view which is needed for full navigation. We do this by selecting the Camera icon in the toolbar on the left or by pressing 'z' on the keyboard. Now when we LMB in the camera view-port our cursor becomes a cross and we can rotate the view by dragging our cross-hair around. Note if you use the keyboard method you must press 'z' again to release the cross-hair where as with the camera icon method releasing LMB release the cross-hair. I should also point out that it is possible to use the RMB but this gives a different result and acts similar to panning in a 2D (Orthographic) view. To move in and out of your view you simply walk forward or backwards like you would in a game, or you can use a scroll-wheel if you have one.
You can LMB or RMB on the view-port name (camera) for the same options as in the 2D view-ports.
When you have finished moving and wish to select an item in the camera view you will need to select the Arrow icon on the left to enable selection then use you LMB to pick an object.
GridsYou have all this time seen light grey lines running vertically and horizontally across the three orthographic view-ports. These are called Grid lines and will help us later to size our objects. You can increase and decrease the amount of grids lines (and therefore their spacing) be using the keys '[' and ']'. You can also enable Grids in your camera view by pressing 'p' and again this can be resized in the same way.
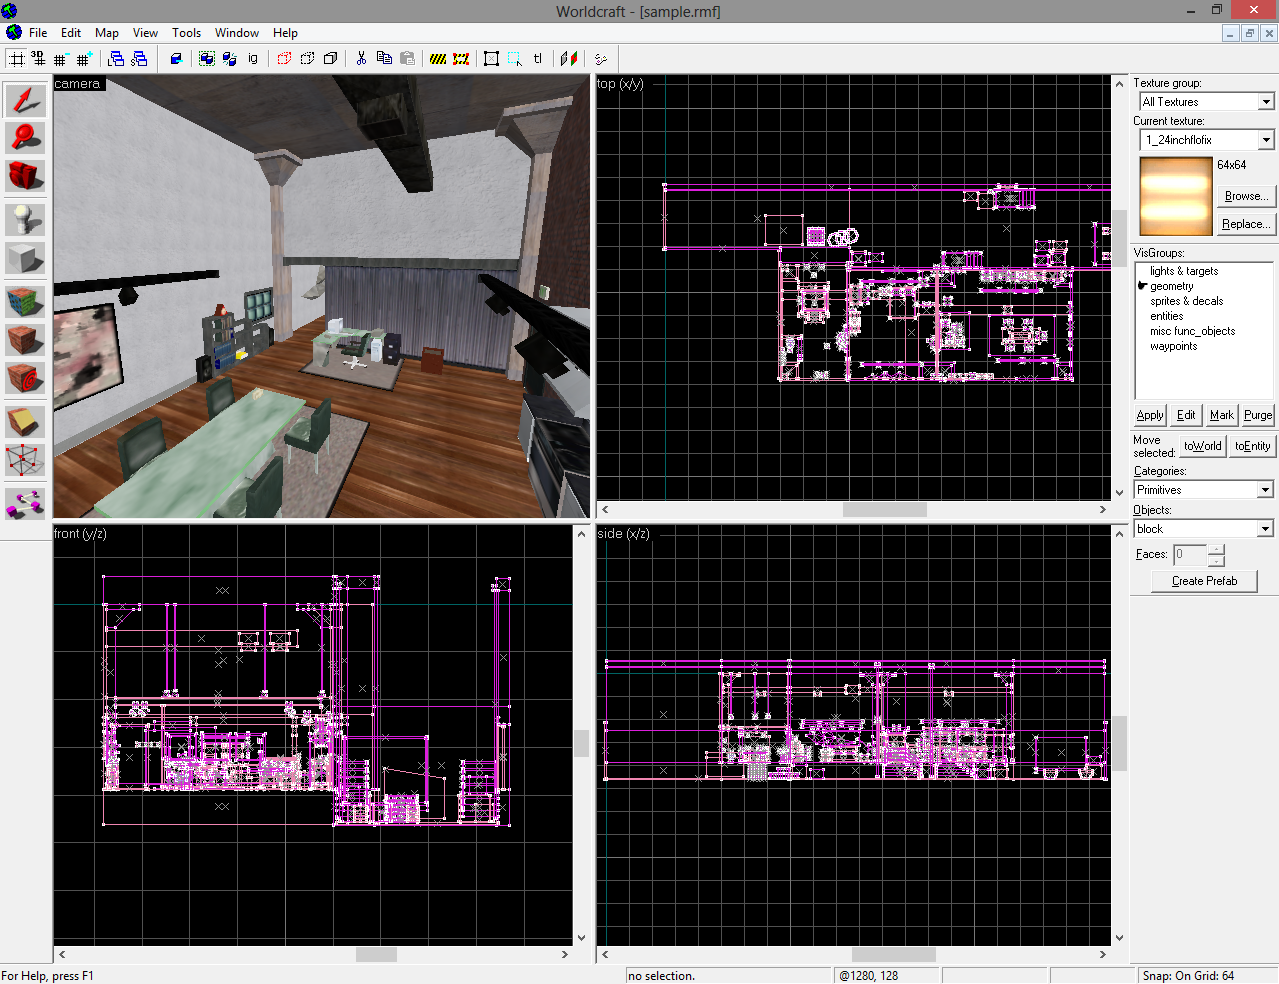
Now before I go on I am going to change my camera view to a textured view (read back if you have forgotten how).
Now the last thing to say is that the view-port windows can be resized to your liking by hovering your mouse over where they meet until your icon changes to a cross with arrows on it and dragging with your LMB pressed. Or by hovering over where two view-port windows meet and doing the same.
 Topic: How To Make Levels For SWAT 3: 02 - Interface - Viewports. (Read 9147 times)