Show Posts

This section allows you to view all posts made by this member. Note that you can only see posts made in areas you currently have access to.


Topics - CraftyReaper

Pages: [1] 2 3
1
SWAT 3 General Discussion / Walkthrough
« on: May 09, 2021, 03:18:06 AM »
I never thought it needed one but I ran across the site that has a walkthrough listed for SWAT 3.

https://www.walkthroughking.com/text/swat3.aspx

Then I came across another https://www.ign.com/faqs/2004/swat-3-tactical-game-of-the-year-edition-walkthrough-507446

2
Rainbow Six General Discussion / Maps Available For RavenShield
« on: June 17, 2014, 06:57:04 PM »
Over the past few days we have started the process of adding RavenShield maps to the download section. During the initial pass we will be giving each map a quick play through and then adding them in order of information available. For example a map with a readme and instructions on how to use it will be uploaded before we get into the ones where we have to track down information. Also in this first pass we will add descriptions and screenshots if provided by the author. Hopefully this will let us get the working files up to you quickly and we can add the more troublesome ones later.

It seems that time, map-packing and file swapping has left a fair amount of maps without their readme files and therefore the authors wishes regarding hosting. At this point most of the original hosting site cease to exist, however if we host a file and the author wishes it removed then we will be happy to do so.

If you remember a specific map and cannot find it here it may be that the file still had a readme stating not to host, or that permission is required. If you have maps that we do not and they are not restricted then please let us know where to find them if you wish to see them hosted here.

3
SWAT 4 General Discussion / Maps Available
« on: June 17, 2014, 06:55:07 PM »
Over the past few days we have started the process of adding SWAT 4 maps to the download section. During the initial pass we will be giving each map a quick play through and then adding them in order of information available. For example a map with a readme and instructions on how to use it will be uploaded before we get into the ones where we have to track down information. Also in this first pass we will add descriptions and screenshots if provided by the author. Hopefully this will let us get the working files up to you quickly and we can add the more troublesome ones later.

It seems that time, map-packing and file swapping has left a fair amount of maps without their readme files and therefore the authors wishes regarding hosting. At this point most of the original hosting site cease to exist, however if we host a file and the author wishes it removed then we will be happy to do so.

If you remember a specific map and cannot find it here it may be that the file still had a readme stating not to host, or that permission is required. If you have maps that we do not and they are not restricted then please let us know where to find them if you wish to see them hosted here.

4
SWAT 3 Modding / Mapping / MP5 Retexture
« on: June 02, 2014, 02:59:54 AM »
Whilst talking with DarkSynopsis today about the Last Resort mod and it's capabilities. I decided to re-texture a weapon to see how much better I could make it look with just a new texture (a reskin). I took the MP5 A2 with the flashlight (the one they give as an example in the tools folder.) The results can be seen on the news page and you can grab it from the download section. N.B. you need to be running the Last Resort Mod to use it (See ReadMe file).

5
We have released a mission manager for Takedown custom missions, which can be found in our download section. Here you will also see a readme explaining how to use it and what it does. Any comments or suggestions you might have can go here.

6
The main example map is TD05_HQ and contains all of the level. However there are broken down sections to allow you to see how it was laid out and what goes where, along with mode layouts.


BUILDING (HQ)


TD05_S_Structure (Helps us see how the main building was structured)

This contains the entire concrete structure of the HQ including Glass and a lightmassimportancevolume


TD04_S_Exterior (Shows how the exterior was laid out)

This map is the exterior area of the HQ level.

Contents= Static Meshes,Prefab Security Cameras,DecalActors,PointLight,LightMassImportanceVolume,InterpActor (Mountains),SpotLights


TD04_S_Atrium (Shows the Atrium layout)

This is a part map of the HQ level featuring the Atrium Section (Reception)

Contents = Static Meshes,Lightmass Importance Volume,Spotlight,PointLight,DecalActor.


TD04_S_Floor1 (Shows how floor 1 was laid out)

This map holds floor 1 of the HQ level.

Contents= Static Meshes,PointLight,LightMassImportanceVolume,SpotLights


TD04_S_Floor2 (Shows how Floor 2 was laid out)

This map holds floor 2 of the HQ level.

Contents = Static Meshes,PointLight,LightMassImportanceVolume,SpotLights


TD_04_S_Garage (The garage section layout)

This is the garage area of the HQ.

Contents= Static Meshes,Spotlights,PointLights,LightMassImportanceVolume,Security Camera Prefab,DecalActor


TD05_S_SideBuilding (Side building layout)

This is the sidebuilding area are of the HQ.

Contents = Static Meshes,Spotlights,PointLights,LightMassImportanceVolume,DecalActor


FEATURES


TD04_S_Doors (Shows the door layout)

This map features prefabricated doors laid out in what seems to be the positioned they would be inside the HQ map.


TD04_S_AmbientAudio (Helps see how Serellan laid out their Ambient Sounds)

AkAMbientSound layout for the HQ along with the TDAudioAmbientVolume layout.


TakedownEntry (An early Mesh or texture sizing example - guess?)

A fairly empty level containing several static meshes with sizing textures & a PlayerStart.


TD_Audio_Persistent (Unsure what this does - Something with Audio)

This map is empty of objects.


TD_04_S_FX (Shows us the tree layout)

This Map has static meshes of trees laid out as per the HQ level.


TD04PC_S_Trees (Shows us more trees laid out

This map show us static meshes of more trees laid out


TD04_S_Glass (Helps us see how the glass was laid out and triggered)

This map contains all the breakable glass for the HQ level.


TD04PC_S_Rigid (Lets us look at some rigid body examples)

This map contains a few static meshes that have rigid body physics applied.


TD04XB_S_NonRigid (Lets us look at some rigid body examples)

This map contains a few static meshes that have rigid body physics applied. (Unsure due to the NON part of the filename.)


TD04PC_S_Art (Shows us the Art Layout)

This map was confirmed as a junk file by MarkN pf Serellan so best to ignore as it can cause crashes in the editor.


TD04XB_S_Art (Shows us the Art Layout)

This map contains the animated wall art from the HQ level.


MODES


TDD04_S_attdef (Layout for Attack & Defend) ( this has two more varients)var2,var3.

A look at the attack & defend mode setup.

TDD04_S_bombdisarm (Layout for Bomb Disarm)

A look at the Bomb Disarm mode setup.

TDD04_S_lastman (Layout for LastMan Standing)

A look at the Lastman Standing mode setup.

TDD04_S_mission (Layout for Mission)

A look at the Mission mode setup.

TDD04_S_mission2 (Layout for Mission2 not sure how this differs.)

A look at the Mission mode setup.

TDD04_S_tangohunt (Layout for TangoHunt)

A look at the Tango Hunt mode setup.

TDD04_S_teamdm (Layout for Team DeathMatch)

A look at the Team DeathMatch mode setup.

7
On initially running the Takedown editor you are greeting with a load error screen with a long list of missing objects and files. This is to be expected and it is alright to click 'OK' and continue into the editor. (Confirmed by TerryTheHammer from Serellan).

On looking around the content browser I found no map files within the 'Maps' folder, so instead went to the default file-->open option and pointed my browser to 

C:\Program Files (x86)\Steam\steamapps\common\Takedown Red Sabre Level Editor\TakedownGame\Content\Maps

and found a list of available levels to look at.

I started by loading up the TD04_HQ.umap and was greeted with another load error screen which I promptly dismissed by hitting OK. Low and behold I was inside the HQ map in all it's editing glory. Now it was time to stroll around and see what I could find out. As I am writing this at the same time (so as not to forget something ) I might at this point discover nothing of use and burn up these first thirty minutes too quickly. Here goes.

The first 30 Minutes. I spent this time initially flying through the scene and looking at the different actor classes that were available such as the emitters and path nodes, cover nodes , player starts etc. I noticed a fair few materials/textures/decals missing and sort of expected this due to the load errors. It was then I decided to hit Play From Here in the editor and after 5 minutes of saving the scene (even though I had not edited anything) it launched in a window. I was fully able to run around the level and could shoot with the LMB and open doors with space, I could not however see my weapon or any HUD. Also I could hear voices like ' I hear gunfire" but never came across anyone officer or suspect. I am guessing on making a map you would need to actual get it running in the main Takedown folder to have access to all this.

A more detailed analysis will take time and will hopefully come later. With the lack of official documentation I do not know I even loaded the intended mission from the right folder. I am confident that over the next few days we will have a lot more information. Should be fun.

8
Takedown Red Sabre Modding / Mapping / The Editor Is Live
« on: March 06, 2014, 05:52:39 PM »
Serellan have managed to wrangle Epics approval, and the Level editor for Takedown Red Sabre is now live. Head to steam and look under your Library for the Tools section, you can download it from there. (3.6GB)

It features all the environmental assets along with the Killhouse maps and the H.Q map to use as a guide to building your own levels. Time to get creating.

9
SWAT 3 Modding / Mapping / SWAT 3 Last Resort
« on: February 27, 2014, 08:21:01 PM »
Just a quick note to say that the Last Resort website is back up and running. We encourage SWAT fans to hurry over and check it out.

http://www.swat3lastresort.info/mod/index.php

10
Right at the bottom of the editor we come to the last interface item and that contains the command bar and as equally important the grid and snap tools.


The Command part of the bar is for the more experienced user who can run commands directly from this input panel. outside of the scope of this introduction to the interface. next to this is a log button to call up recent information on what you have been doing in the editor and what the editor has been doing in the background. Followed by the next few icons that concern themselves with how we will layout our geometry and how these tools can aid us.

The padlock icon helps us lock our selection which is important once we have something positioned right and do not wish to affect it.

The Vertex icon lets us toggle Vertex snap on and off. Very important for precise lining up of geometry.

The Grid icon lets us toggle grid snapping on and off, again important for brush/actor placement.

Then we can control the size of our grid from 1 to 4096 in incremental steps that allow us to snap to our brushes.

Finaly we have the rotation snap toggle on and off, which allows up to rotate precisely also.

This wraps up the interface and should shed a little light on what you are going to be doing. Although simply editing geometry and placing actors is a far way from completing a fully playable level to the quality of what is currently in the game.  It is however not far from seeing some results and therefore gaining encouragement to continue. A few carved out blocks a few lights and a player start point and you are moments away from running around in a space created by you.

11
On the left hand side of the editor (default layout) you will see a toolbar which is quite feature packed. So we will break it down into its sections for a brief overview. However it is at this point that you might be wondering what a brush is and why there was a whole drop down menu dedicated to it in the last tutorial.

Where the menu is concerned it is referring to what is known as the Builder Brush. This is a selection tool that allows us to generate the shapes we need to cut out geometry or add it back in. Once we get started with the building process this will become clearer, but for now know that most of your initial level design will be made using the Builder Brush (this shows up as a darkish red in your viewports and can be selected with the LMB(where it becomes brighter)). It is by resizing and then adding or subtracting with the Builder Brush that we create geometry. The geometry that you create are also known as brushes (these show up as yellow for subtractive and cyan for additive). They will remain in your scene unless deleted and become your walls and floors etc. It is to these brushes that we add textures to make them look more like the geometry we want.

The reason for covering this briefly is that the toolbar has quite a few tools that deal with brushes and their usage. The first few tools ironical do not.


Camera Movement - Allows you to move your view in the perspective window.
Vertex Editing - Allows the selection and movement of vertices.
Actor Scaling - Allows you to scale the size of the selected actor.
Actor Rotate - Allows you to rotate the selected actor.
Texture Pan - Allows you to pan a texture across a surface.
Texture Rotate - Allows you to rotate a texture on a surface.
Brush Clipping - Allows you to cut an angle across a brush.
Freehand Polygon Drawing - Allow you to craw out polygon shapes.
Face Drag - Allows you to select and extrude a face.
Terrain Editing - Allows you to edit terrain.
Matinee - Give you access to the Matinee editor.
Geometry Editing - Allows you to edit your geometry.

So now with the mention of actors I guess I should clarify and say that actors can be all sorts of selectable item such as lights and meshes, sound nodes and AI pathnodes.


Clip Selected Brushes - Allows you to clip (reshape) selected brushes.
Split Selected Brushes - Allows you to split selected brushed (add more vertices where split).
Flip Clipping Normal - Flips the normal (a normal is the direction a face in pointing).
Delete Clipping Markers - ???


Cube - Premade cube shape for your Builder Brush (RMB for settings).
Curved Staircase - Premade curved staircase shape for your Builder Brush (RMB for settings).
Spiral Staircase - Premade spiral staicase shape for your Builder Brush (RMB for settings).
Linear Staircase - Premade linear staicase shape for your Builder Brush (RMB for settings).
BSP Based Terrain - Terrain for your Builder Brushes (RMB for settings).
Sheet - A plane shape for your Builder Brush (RMB for settings).
Cylinder - Premade cylinder shape for your Builder Brush (RMB for settings).
Cone - Premade cone shape for your Builder Brush (RMB for settings).
Tetrahedron (Sphere) - Premade sphere shape for your Builder Brush (RMB for settings).
Volumetric (Torches,Chains etc) - ???


Add - Adds the shape of your Builder Brush to the world.
Subtract - Subtracts the shape of your Builder Brush from the world.
Intersect - Intersect the shape of your Builder Brush with the world.
Deintersect - Deintersects the shape of your Builder Brush from the world.
Add Special Brush - ???
Add Static Mesh - Adds a static mesh to the world.
Add Mover Brush - Lets you turn a static mesh into a movable object (RMB for all Mover types)
Add Antiportal - Adds an Antiportal.
Volume - Adds a volume block to the world (this allows for water volumes & trigger volumes etc).


Show Selected Actors Only - Display select actors.
Hide Selected Actors - Hides selected actors.
Show All Actors - Unhides all actors.
Invert Selection - Inverts the selection.
Change Camera Speed - Lets you control the speed of your camera movement.

12
Along the top of the editor you will see the usual windows drop down menus along with some SwatED specific ones. Under this you will see what is best described as an operations menu-bar.


So lets deal with the drop down menus first.

File:

New - Creates a new scene (level) for us to work in. (Ctrl+N)
Open - Opens an existing scene to work with (Ctrl+O)

Save - Lets us save our current scene.(Ctrl+L)
Save As - Let's us save our current seen and rename it.

Import - For importing items into our scene.
Export - To export items out of our scene.

Exit - Closes the editor.


Edit

Undo - (Ctrl+Z)
Redo - (Ctrl+Y)

Search For Actors - Opens up a list of actors that you can click to find one.

Cut - Cuts an object/s (Ctrl+X)
Copy - Copies an object/s (Ctrl+C)
Paste - Pastes copied object/s (Ctrl+V)

Duplicate - Duplicates selected object/s (Ctrl+W)
Delete - Deletes selected object/s (Del)

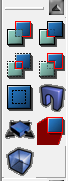
Select None - Deselects All. (Shiftl+Z )
Select All - Selects all actors in the scene. (Shift+A)
Select All Surfaces - Selects all The Surfaces In The Scene. (Shift+S) This has a sub-menu allowing you to choose types.


View

Log - Brings up a log windows showing you recent events.

Rendering Emulation - Allows you to emulate a different rendering platform such as GeForce or XBox.

Show Master Browser - A combination browser for searching all areas.
Show Class Browser - Allows you to do a search for different Classes
Show Animation Browser - Allows you to do a visual search for available Animations
Show Group Browser - Allows to search for groups.
Show Static Mesh Browser - Allows you to do a visual search for available Static Meshes.
Show Texture Browser - Allows you to do a visual search for available textures.
Show Prefab Browser - Allows you to do a visual search for available Prefabs.
Show Mesh Browser - Allows you to do a visual search for available Meshes.
Show Script Browser - Allows you to do a search for available scripts.
Show Music Browser - Allows you to do a search for available music.
Show Sound Browser - Allows you to do a search for available sounds.
Show LIPSinc Browser - Allows you to do a search for available lipSinc files.

Actor Properties Inspector - This allow you to bring up the properties for the selected item. (F4)
Surface Properties - this allows you to access the propertied of the selected surface. (F5)
Level Properties - Access to the level properties. (F6)
Script Properties - Access to the properties of the selected script.
Advanced Options - Access to many of the Editors properties.

Viewports - Viewport tools.
Background Image - Tools for working with a background image.


Brush

Brush Clip - Tools for working with the brush.
Reset - Tools for resetting the brush (e.g reset rotation).
Scale - Set the scale of a brush

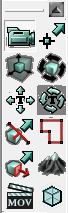
Add - Add a new brush to world, based on the current Builder Brush. (Ctrl+A)
Subtract - Subtract a new brush from world, based on the Current Builder Brush. (Ctrl+S)
Intersect - Intersect brushes based on the current Builder Brush. (Ctrl+N)
Deintersect - Deintersect brushes based on the current Builder Brush. (Crtl+D)

Add Mover - Turn a static Mesh into a movable object.
Add Antiportal - Adds an antiportal. An antiportal is used as a type of barrier to block geometry from the render process. This is an advanced topic and they are mainly used for optimization reasons.
Add Special - This is used to add in meshes that have been converted to brushes to better fit a geometric shape. This is an advanced topic and they are mainly used for optimization reasons.

Open Brush - Allows you to open a saved brush.
Save Brush As - Allows you to save custom brushes.

Import - Various formats such as ASE
Export - Exports to .OBJ
Batch Import - Imports multiple items.


Build

Play Level - Lets you play your level. (Ctrl+P)
Rebuild Geometry Only - rebuild geometry after changes.
Rebuild Lighting - Rebuilds lights.
Rebuild Changed Lighting Only - Rebuilds lights after changes.
Rebuild AI Paths - Rebuilds AI pathing.
Build All - Rebuild All.

Build Options - Allows you to customize the building options.


Tools

2D Shape Editor - Build 2D spline shapes.
Scale Lights - Adjusts the lighting as a group.
Check Map For Errors - Checks the integrity of your level.
Scale Map - Adjusts the scale of the level as a whole.
Reset Existing Particle Emitters - Returns emitters to their original state.
Rotate Actors - Rotates selected actors.
Review Path - Auto reviews pathing.
Debug Path Between - Tool for debugging AI patways. Please comment in you have more information on this tool.


Help

Tip Of The Day - Shows tooltips. hotkeys etc.
Context Help - Shows helpful information pertaining to your current selection.
Unreal Developers Network - Access the unreal Developers Network website.
Irrational Games - Take you to the developers website.
Official Product Website - Takes you to www.swat4.com (No longer active).


Now on to the operations menu-bar.


From left to right.

New - Same as in the drop down menus.
Open - Same as in the drop down menus.
Save - Same as in the drop down menus.

Undo - Undo recent changes
Redo - Redo recent changes

Search for Actors - Same as in the drop down menus.
Class Browser - Same as in the drop down menus.
Group Browser - Same as in the drop down menus.
Music Browser - Same as in the drop down menus.
Sound Browser - Same as in the drop down menus.
Texture Browser - Same as in the drop down menus.
Mesh Browser - Same as in the drop down menus.
Prefab Browser - Same as in the drop down menus.
Static Mesh Browser - Same as in the drop down menus.
Animation Browser - Same as in the drop down menus.

2D Shape Editor - Same as in the drop down menus.
UnrealScript Editor - Called just script editor in the drop down menus.

Actor Properties - Same as in the drop down menus.
Surface Properties - Same as in the drop down menus.

Build Geometry - Same as in the drop down menus.
Build Lighting - Same as in the drop down menus.
Build Changed Lighting - Same as in the drop down menus.
Build Paths - Same as in the drop down menus.
Build Awareness Graph - This is used to build AI awareness. - Please comment if you have more information on this subject.
Build All - Same as in the drop down menus.
Build Options - Same as in the drop down menus.
Play Map - Same as in the drop down menus.
Context Sensitive Help - Same as in the drop down menus.

So as you can see this shelf of tools is simply a graphical representation of most of the tools in the drop down menus. This is where it becomes the users preference to use the icons, the menus or remember and use the hot keys. In the next part we will discuss the left side toolbar.

13
Swat 4 levels are created using the SwatED tool. which is an adapted version of the Unreal 2.0 Engine. The Editor comes with the game and is installed as standard when you install the game. To locate and run the editor you will need to find it in it's default directory structure, whichever drive you installed to.

SWAT4/content/System/SwatED.exe

You are going to be using this regularly while level editing. So I suggest you make a shortcut on you desktop.

A point to note early on is that SwatED uses a Subtractive approach to level editing rather than the more usual Additive. This means that instead of starting with an empty world and adding your geometry,meshes,lights etc. You will instead be carving out areas to work in. A way to picture this is to imagine a solid block of clay that you can reach into and take chunks from without damaging the surrounding area. So if you know how large your total map is you could in theory go ahead and carve out a chunk that big and then add stuff back in. However the normal approach is to build your level area by area (room by room so to speak) and then carve out the outside if needed.

With this understood its time to go ahead and launch the editor. You should then be presented with the default view of a completely solid world. This is the black area in the bottom left window of the four views you see, also known as the perspective view. the remaining three views are also showing you the world but in an orthographic way (flat). They are depicting your would from a top down, side on, and Front point of view.

So before we discuss the tools and menus you see we will go over navigating these four viewports.

In the Orthagraphic viewports you can use you left mouse button (LMB) or your right mouse button (RMB) and drag to pan around the view. If you hold both of these mouse buttons down and move forward or backwards on your mouse you can zoom in and out of the view. All of this can be achieved with the middle mouse button / scroll wheel (MMB) if you have one, by holding the MMB down and dragging to pan, and scrolling the wheel forward and backwards to zoom in and out.

The perspective viewport work a little differently. This time the LMB will allow you to rotate around the scene and move in and out of it while holding and dragging. The RMB will also let you rotate in the same way, but the forward and backwards motion will make you look up and look down. The MMB does nothing.

Now that you know how to navigate the views it is time to learn what all the buttons along the top of each viewport do.

The joystick allows you to run (play) your level in that viewport.

The T,F,S buttons allow you to switch the viewport to the view you want T for top F for front and S for side, in case you feel more comfortable with a different setup.

The boxes you see are for displaying the contents of the viewports in different styles wireframe, textured, dynamic lighting etc. Without content in our scene it is difficult to see any results. As you move forward you may wish to check out these options more closely.

The eye icon lets you lock your view to a selected actor.
The last icon allows you to display bigger vertices.

 In the next tutorial we will look at the menu bar.

14
So we are left with the three areas on the right of the interface and the status bar at the bottom. the status bar simply send messages to reflect what you are doing on screen.

Top right we have the Texture area which display the current texture you have selected and allow you to select others through the drop down under current texture. The texture group drop down menu lets you display textures from a single selected WAD file or all of the loaded WAD files.

In the Middle we have the VisGroups, these work like layers in other application. You can create groups and add selection to them enabling you to turn their visibility in the scene on and off.

Finally we have the Object Bar, which gives us information about our selections

15


From Left to Right

Carve With Selected Objects - Carves out shape in other brushes with the selected brushes.
Group Selected Objects - Create an associated group with the objects selected.
Ungroup Selected Objects - Ungroups an associated group of selected objects.
Toggle Group Ignore - Ignore group on / off.
Hide Selected Objects - Hides selected objects.
Hide Unselected Objects -  Hide all unselected objects.
Show All Visigroups - Show all Visigroups
Cut - Cuts selected objects.
Copy - Copies selected objects
Paste - Pastes selected objects.
Toggle Cordon State - Toggles cordon state on / off.
Edit Cordon Bounds -
Toggles Select-By-Handle - Toggles select-by-hands on /off.
Toggle Auto-Selection - Toggles auto-select on/off.
Texture Lock - Texture lock.
Texture Alignment - Align textures
Run Map - Run the map.

Pages: [1] 2 3
anything